Tomorrow is St. Patrick's day and it is also D's birthday!
My family has a little birthday cake tradition. Everytime someone on my mom's side of the family has a birthday, they ask my nana to make them a chocolate cherry cake. She has been baking these for as long as I can remember. Last year for D's birthday, I asked her for the recipe so I could give it a shot. He loves the cake and I do to, so when I asked what kind of cake he wanted this year he said the chocolate cherry cake (of course!). I'd love to have this recipe recorded somewhere in visual form to share with my family, so I thought this would be a great opportunity to do my first recipe blog post.
This recipe is pretty easy because its based from a boxed cake and you don't need many other ingredients. My nana told me that it is called a torte because the sides are not frosted. You can frost them if you want though :)
Easy Forest Torte
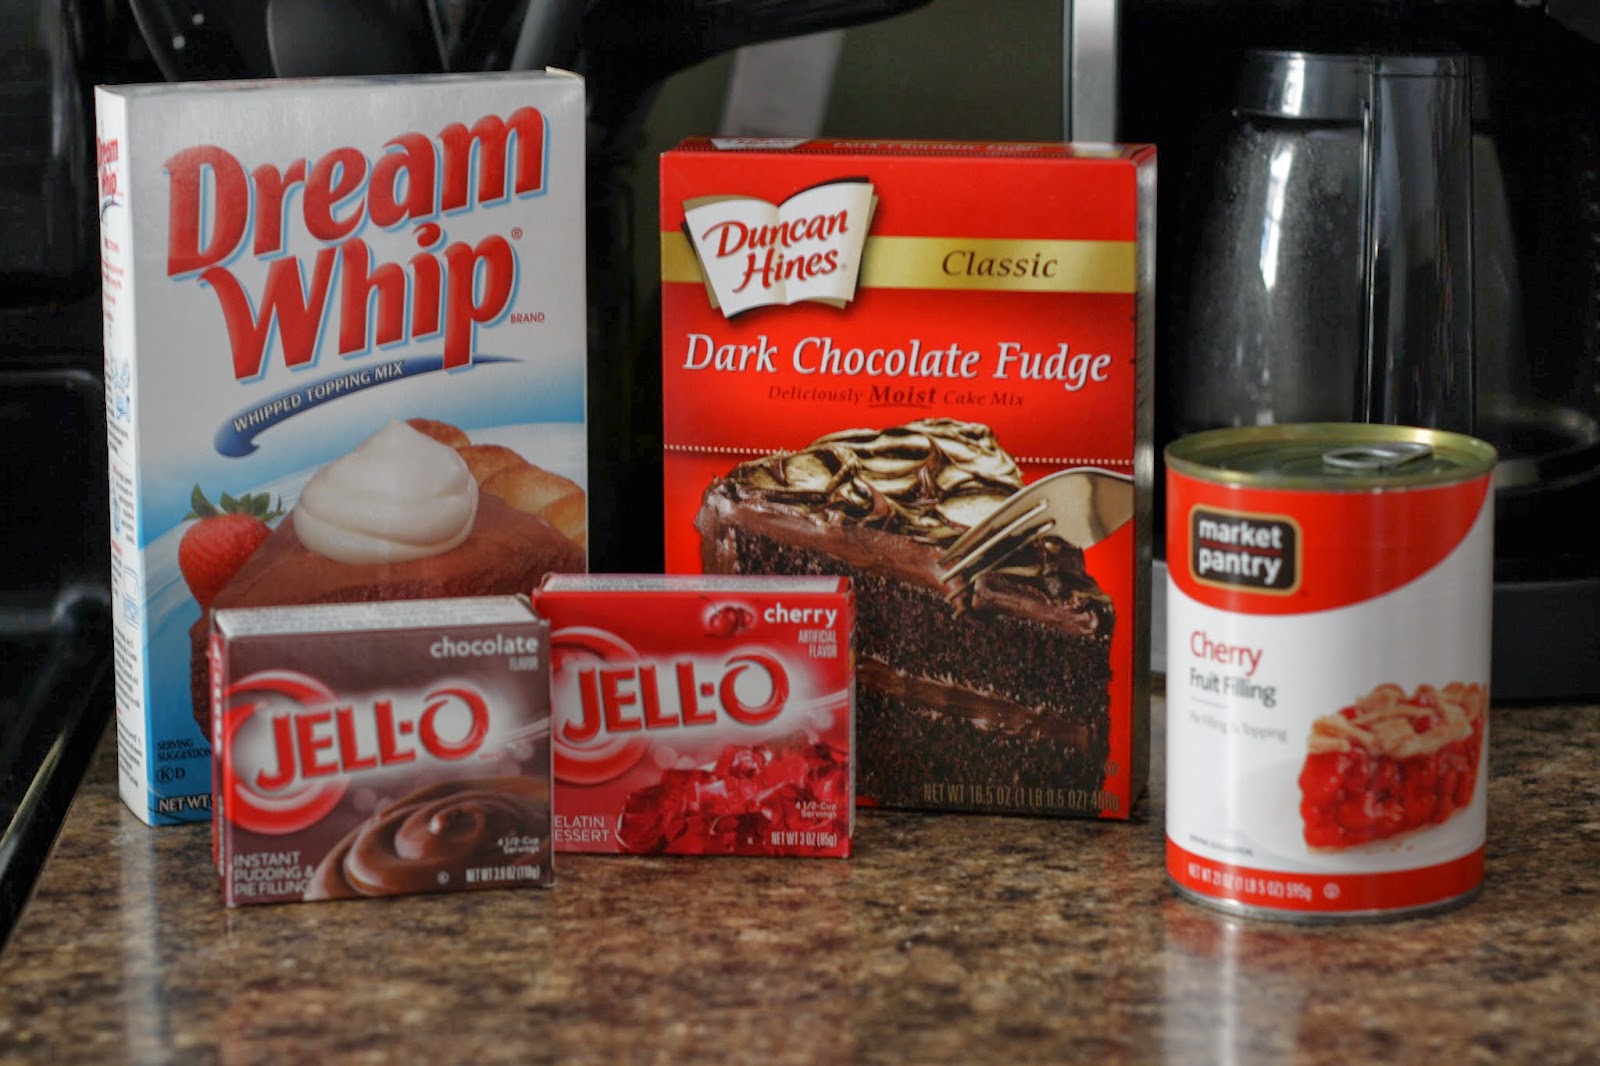
You will need:
1 box chocolate cake mix
1 box cherry jello
2 envelopes dry dessert topping (1box)
1 box dry instant chocolate pudding
1 can cherry pie filling
Bake chocolate cake according to recipe on box in 2 9" round pans. These should be greased and floured.
When the cake is done, put the cake on parchment paper and let cool (I used wax paper because I don't have any parchment paper. This just makes clean up easier).
Poke a bunch of holes in both layers of cake with fork (I used a corn cob holder).
Mix jello mix with 3/4 cups boiling water until dissolved and add 1/2 cups cold water.
SLOWLY pour all jello over top of both layers and let set. Do this slowly so that the cake can absorb the jello. Try to evenly cover both layers of cake with the jello.
Refrigerate for 2-3 hours. After you let the cakes set, transfer one of the cakes to a nice plate or cake stand and remove the wax or parchment paper.
Next, you will make the frosting. Mix 2 envelopes dry dessert topping with 1 box instant chocolate pudding mix and 1 1/4 cups cold milk. Beat until stiff peaks form (about 5 minutes or so).
On bottom layer of cake, use frosting to make a ring and put cherries in the middle. Use a lot of cherries- this is the best part!
You will then put the second layer of cake on the top and frost. Use the rest of the cherries in the middle and voila! You have an easy and delicious cake! This cake will need to stay refrigerated due to the jello and whipped frosting.