Tuesday, May 20, 2014

Our 1923 Colonial

We knew the moment we saw the images online that this was the one. When we walked in, it felt like home. It has everything on our wish list- sun room, wood floors, nice kitchen, wood burning fireplace, and lots and lots of charm. The location is great too- just North of downtown Minneapolis in Theodore Wirth Park. Thats right, I said IN a park! How much better can it get? Our front yard is actually part of the park. And we are steps away from a beautiful bike trail and a short distance from a lake. Dream come true.

All of these pictures are from the MLS listing.

Front of the house:
View of the yard:
Entry:
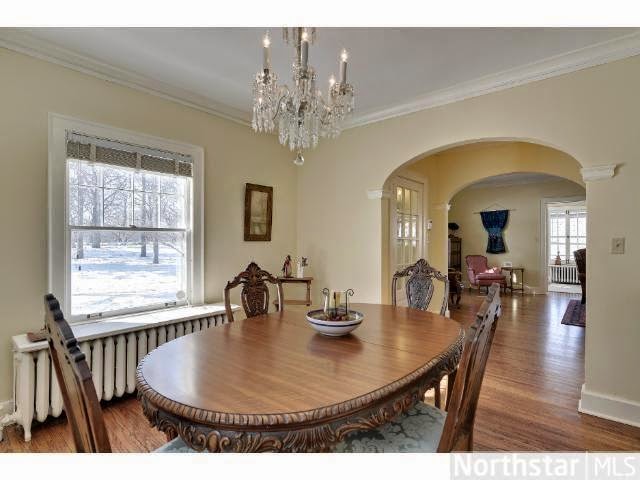
Dining room:
Kitchen:
Living room:
Sun room
Upstairs full bathroom:
First bedroom:
Second bedroom:
Master bedroom:
Yard and garage:

Monday, May 19, 2014

We bought a house!!!

Well, I am happy to finally announce after weeks of anticipation that we closed on our new house May 16th!

We could not be more excited! Of course for weeks I have been scheming and planning and picking out paint colors and ordering furniture. I about drove D and myself crazy! He said I was giving him grey hair hehe. But it was all worth it because we are finally homeowners!


Now I have PLENTY to blog about! I am so excited to embark on this journey of home ownership with the love of my life! And our 2 cats :)

Wednesday, May 7, 2014

Target Coastal Collection

I am very excited that a project I worked on has hit the stores! The Threshold Coastal collection is all about summer dining and entertaining. Check it out in stores!


Here I am cheesing with my product! :)

Monday, May 5, 2014

How I stay sane throughout the wedding planning process

Anyone who knows me knows that I am a planner. OCD? Maybe. A perfectionist? Definitely. There are so many details about weddings that it is easy to get overwhelmed. After a few months of panicking about how everything was going to work out, I created a tool to keep myself sane. I call it my "ULTIMATE WEDDING PLANNER". Trust me, when you see it you will understand why the title is in all caps. It is a lot to digest, but I promise if you use this tool it will keep you on track. I set up different pages for different kinds of wedding information so I can keep it all in one file. The guest list, upcoming tasks, the day of timeline, an expenses list, budget and more. It has really helped me to prioritize, organize and figure out when things need to be done. I collected information from various websites to determine when to send save the dates, invites, order dresses, etc. I am uploading a template for anyone to use. It's an excel document so you should be able to download from google docs and edit in Excel. I left some information in there as examples to show you how I used it, but feel free to edit it so it works best for you. Let me know if it has helped you :)

Monday, April 14, 2014

Exciting news coming soon...

I have some very exciting news that I am anxious to share very soon...

Definitely something I will have lots of fun blogging about.

Stay tuned....

Tuesday, March 25, 2014

Handmade Ceramics

I am lucky enough to live in a city where ceramics and local artists are a big deal. There are a ton of ceramics resources here in Minneapolis. I am taking a ceramics class at the Powderhorn Park community center and I love it! Although my pieces aren't perfect (hey, it's ceramics!), I have created quite a few that I love. I've made a few mugs that I hope to give as gifts for people that help with the wedding. Here are some images of the process and finished work.

Starting with a chunk of clay


And all the necessary tools


Forming into a ball


Adding lots of water


Centering- the hardest to figure out but once you do, you're golden


Shaping the clay


Opening the clay up


Pulling the clay up into mug form 


Some finished pieces after being cleaned up


Pieces that have been bisque fired


Dipping the pieces into glaze


Finished pieces


If you are ever able to take a ceramics class, I highly recommend it! It's a relaxing, fun activity. The only ceramics experience I had before taking this class was in high school. I was definitely a beginner when I started. I found that I have more fun when I don't try to make anything- I just play with the clay until I form something that looks like it could be something beautiful once trimmed and glazed. It's amazing what you can make with a ball of clay!


Sunday, March 16, 2014

Easy Forest Torte

Tomorrow is St. Patrick's day and it is also D's birthday!
My family has a little birthday cake tradition. Everytime someone on my mom's side of the family has a birthday, they ask my nana to make them a chocolate cherry cake. She has been baking these for as long as I can remember. Last year for D's birthday, I asked her for the recipe so I could give it a shot. He loves the cake and I do to, so when I asked what kind of cake he wanted this year he said the chocolate cherry cake (of course!).  I'd love to have this recipe recorded somewhere in visual form to share with my family, so I thought this would be a great opportunity to do my first recipe blog post.

This recipe is pretty easy because its based from a boxed cake and you don't need many other ingredients. My nana told me that it is called a torte because the sides are not frosted. You can frost them if you want though :)

Easy Forest Torte

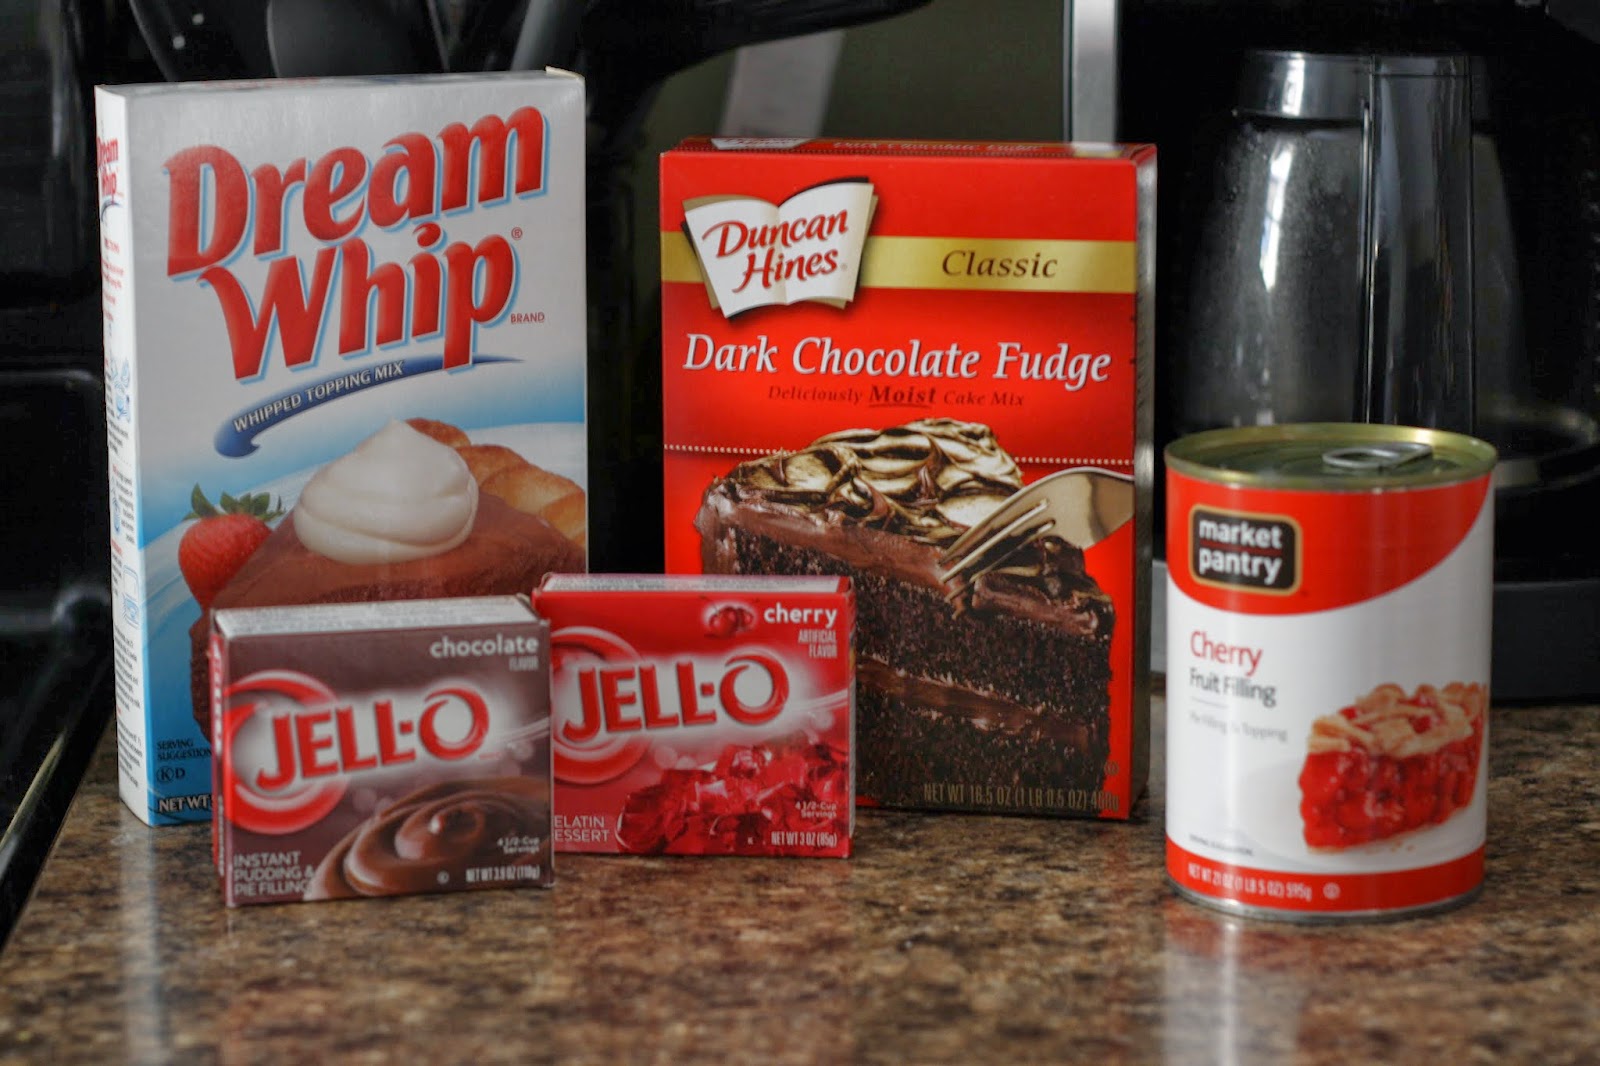
You will need:

1 box chocolate cake mix
1 box cherry jello
2 envelopes dry dessert topping (1box)
1 box dry instant chocolate pudding
1 can cherry pie filling


Bake chocolate cake according to recipe on box in 2 9" round pans. These should be greased and floured.


When the cake is done, put the cake on parchment paper and let cool (I used wax paper because I don't have any parchment paper. This just makes clean up easier).


Poke a bunch of holes in both layers of cake with fork (I used a corn cob holder).


Mix jello mix with 3/4 cups boiling water until dissolved and add 1/2 cups cold water.


SLOWLY pour all jello over top of both layers and let set. Do this slowly so that the cake can absorb the jello. Try to evenly cover both layers of cake with the jello.


Refrigerate for 2-3 hours. After you let the cakes set, transfer one of the cakes to a nice plate or cake stand and remove the wax or parchment paper.

Next, you will make the frosting. Mix 2 envelopes dry dessert topping with 1 box instant chocolate pudding mix and 1 1/4 cups cold milk. Beat until stiff peaks form (about 5 minutes or so).


On bottom layer of cake, use frosting to make a ring and put cherries in the middle. Use a lot of cherries- this is the best part!


You will then put the second layer of cake on the top and frost. Use the rest of the cherries in the middle and voila! You have an easy and delicious cake! This cake will need to stay refrigerated due to the jello and whipped frosting.