Happy New Year everyone! I have been on a little hiatus, but I plan to try and blog more frequently in the coming year because we have many exciting projects planned :)
I will start with a little preview of things we did and things we plan to do:
- back entry before & after- more skim coating
- wedding update with pictures :)
- entry, hallway & stairway painted & gallery wall hung
- radiator covers
- crown moulding
- work bench DIY
I would also like to write some how to posts on painting our shutters, headboard DIY, and corn hole DIY. these are long overdue!
Some projects we are planning to do or are in progress now are:
- insulation & bats in the attic (what???!)
- refinishing the basement stairs
- preparing to finish the basement
OK, I have no excuse not to blog. I have plenty of things to blog about to keep me busy!
Stay tuned.

Tuesday, January 20, 2015

Monday, October 27, 2014
Kitchen Floor makeover
My favorite hobby is to make our house more beautiful, one project at a time. The kitchen floor was at the top of my list.
The floor was the one major thing I didn't like about our house when we first saw it. The flooring in the kitchen is hardwood, but the planks are wide and satined a very orange color and the don't match the flooring in the rest of the house. Honestly to me they look like sub floors. They had a lot of imperfections, nails, gaps, etc. So needless to say, they didn't exactly match the clean look of the rest of the kitchen.
The easiest, most cost effective solution we decided on was luxury vinyl plank flooring. Its basically like laminate wood flooring, only it's made out of vinyl so it's waterproof. No glue or underlayment necessary. It was pretty easy- I did it all myself. D wanted to help but I found once I got in a rhythm it was easier for one person. He helped me move the fridge though.
Here's our floor before:


We ultimately decided on the light because we thought it would look best with our lighter wood cabinets and white cabinets. Of course the animals were around for the whole installation process (check out my big furry fat guy in the sink)


The floor was the one major thing I didn't like about our house when we first saw it. The flooring in the kitchen is hardwood, but the planks are wide and satined a very orange color and the don't match the flooring in the rest of the house. Honestly to me they look like sub floors. They had a lot of imperfections, nails, gaps, etc. So needless to say, they didn't exactly match the clean look of the rest of the kitchen.
The easiest, most cost effective solution we decided on was luxury vinyl plank flooring. Its basically like laminate wood flooring, only it's made out of vinyl so it's waterproof. No glue or underlayment necessary. It was pretty easy- I did it all myself. D wanted to help but I found once I got in a rhythm it was easier for one person. He helped me move the fridge though.
Here's our floor before:
So ugly right? There was hope though! We looked at flooring swatches at Home depot, then looked at Menards. Our goal was to find something that was a similar type of wood (Oak I think?) in the rest of the house with a similar tone. We ended up polling on Facebook and deciding between the light and the dark in the below picture (ignore my toes) :
I started to lay down the flooring to see how it would look and honestly, I wasn't so sure at first. It was such a big difference. But D reassured me so I carried on. I started the night before installation by removing all of the shoe molding and cabinet trim and cleaning the floor well to remove dust. I let the floors dry overnight so I could start the next morning.
The next day, I started to lay down the flooring. I started in the left hand corner, which was our entryway. This way, any oddly shaped areas at the end would be against the wall and behind the refrigerator. All done with the entryway and it was looking awesome!
These were literally the only tools I needed. Installing this stuff was pretty easy.
Just to show a difference between the old floor and new floor. Daaaang.


Final transition between kitchen & dining room. I restained the trim strip to match.
The project was one of the best yet and gave us the biggest bag for our buck. All in all, I think we spent around $250 for our new floor and we love it! Next step, crown moulding :)
Thursday, October 9, 2014
New Portfolio!
I have a new portfolio that I have created for work! It was pretty easy to put together and includes a few of my Target projects that have hit stores.
Check it out!
Portfolio
Check it out!
Portfolio
Monday, September 29, 2014
House Before & After Series: Bathroom
Our home was built in 1923 and still has a pretty original 1920s style bathroom. D and I knew the bathroom would need to be redone when we bought our home. For one, the tile is pink and black. Secondly, there was a huge crack in the tile floor.
See images here:
Some of the built in fixtures were missing or damaged like this towel bar:

Cracked tile:

Ugly pink and black tile:


The second document I created is an excel document with a budget estimate and a step by step to do list with a timeline. We plan on running this by our architect brother in law to see if we missed anything and if he has any advice for us. I used the blog YoungHouseLove as a major source of information for estimating the budget and timeline. They did an entire post on their bathroom renovation that they did themselves. You can check out that post here. It was really helpful inspiration and motivation that we CAN do this! I am starting to contact plumbers now for estimates on removing and installing a new tub. We left a lot of room in the budget for unexpected expenses. I think it depends on how much we decide to do ourselves versus hire a professional. We estimated $10,000 to renovate the bathroom. If our actual total comes in close to $5,000, I will be one happy lady! Here's the timeline and budget breakdown (estimate):

I'm estimating this to take a total of about 18 days, which I would spread out over about a month. So we will plan on not being able to use the bathroom for about a month. We have another toilet, but only 1 shower. Good thing we have gym memberships :)
See images here:
Some of the built in fixtures were missing or damaged like this towel bar:
Cracked tile:
Ugly pink and black tile:
We have some ideas of what we would like to do to the bathroom, starting with a new tile floor and removing the tile on the walls. We plan to keep the toilet since it's fairly new as well as the pedestal sink. It's a pretty small bathroom so the pedestal sink keeps it feeling open. I'd love to get a new whirlpool tub because since our home has only 1 tub I may as well right? I will likely refinish the existing original vanity cabinet and just replace the mirror. We will also be building a nice cover for the radiator.
Here's a good shot of the bathroom in it's current state:
Originally, D and I had discussed ripping out the tile, putting subway tile only in the shower, and patching up the wall then painting. I also wanted to install wood-look porcelain tile flooring. Well, after much thought we have decided we would like to keep the walls tiled and use a 1920s style flooring to retain the home's character.
We have a couple options that I have mocked up in photoshop:
Subway tile in the shower and on the walls
Subway tile in the shower and breadboard on the walls:
What do you think? We are leaning towards all subway tile. What we are looking for is to keep the bathroom mostly white, but paint the upper half of the walls to bring in some color. We have new white towels from our wedding registry and I have some pretty shower curtains with a light aqua/teal paisley pattern I am saving for our new bathroom. We have picked out porcelain hex tile for the floors and traditional white subway tile for the shower and walls. That's how they did it in the 1920s! We are so excited to get started on this HUGE project and we know the bathroom will be stunning when finished!
UPDATE: So, I have found with my other projects that the best way to start off is with a plan. In this case that plan consists of a mood board and an excel document. What would I do without my vast toolbox of computer software?
I updated my original bathroom mood board created back in April when we bought the house to reflect the changes we have made in our reno plans. I tried to include the exact items and finishes we would be selecting so we can see how they will all work together. I'm sure this document will be important motivation for us to keep going while we have no bathroom for a month. I centered around a mood image that best represented what the final result will (hopefully) look like.
I'm estimating this to take a total of about 18 days, which I would spread out over about a month. So we will plan on not being able to use the bathroom for about a month. We have another toilet, but only 1 shower. Good thing we have gym memberships :)
Friday, September 26, 2014
House Before & After Series: Exterior
We love the colonial style of our home. It has so much character with the original windows, columns, and stucco. It just needed a little mini-makeover to really sing.
Here is the house before we did anything to the exterior:


These pictures were taken in May and our house looks so different now! My first project was to paint the front door a bright red color. I love how inviting and bold red doors are. To compliment the red door, I wanted to paint the maroon shutters black. We also had some landscaping work to do.
Here are pictures with all of the updates!


The red and black is such a classic look. And our garden filled out really nicely! Can't wait to really start working on cleaning that up next spring. Altogether, we painted the door red, painted the shutters black, hung up the flag, got urn planters and plants for the porch, put mulch down, planted some hostas and hydrangeas and gave the yard a nice trim. The house could probably use a wash, but we will save that for the spring.
I love our red door! What do you think?
Here is the house before we did anything to the exterior:
These pictures were taken in May and our house looks so different now! My first project was to paint the front door a bright red color. I love how inviting and bold red doors are. To compliment the red door, I wanted to paint the maroon shutters black. We also had some landscaping work to do.
Here are pictures with all of the updates!
The red and black is such a classic look. And our garden filled out really nicely! Can't wait to really start working on cleaning that up next spring. Altogether, we painted the door red, painted the shutters black, hung up the flag, got urn planters and plants for the porch, put mulch down, planted some hostas and hydrangeas and gave the yard a nice trim. The house could probably use a wash, but we will save that for the spring.
I love our red door! What do you think?
Thursday, September 25, 2014
September is almost over and fall is here!
You know what that means?
Wedding is over and we will be focusing on some house projects. We had an amazing wedding and honeymoon! I will be sure to post about our wedding pictures when we get them back. I know they will be stunning!
Now that the wedding is behind us, we have a lot more free time so I will be able to update my blog more frequently as we continue to tackle some house projects. The big one for the winter will be (hopefully) renovating our bathroom. It needs a major overhaul. We're talking new floors, new tub, new tile- the works. I have also decided that while we are redoing the bathroom we might as well invest in a whirlpool tub, right? YOLO.
I will post soon to show our house exterior mini- makeover.
Wedding is over and we will be focusing on some house projects. We had an amazing wedding and honeymoon! I will be sure to post about our wedding pictures when we get them back. I know they will be stunning!
Now that the wedding is behind us, we have a lot more free time so I will be able to update my blog more frequently as we continue to tackle some house projects. The big one for the winter will be (hopefully) renovating our bathroom. It needs a major overhaul. We're talking new floors, new tub, new tile- the works. I have also decided that while we are redoing the bathroom we might as well invest in a whirlpool tub, right? YOLO.
I will post soon to show our house exterior mini- makeover.
Wednesday, July 30, 2014
House Before & After Series: Kitchen
If you read my previous post, you saw what the kitchen looked like when we moved in and how much elbow grease it took to get it where we wanted it. The kitchen has beautiful white cabinets, butcher block counters and an awesome deep farm sink. Everything was gorgeous, except for the walls. It just needed a little facelift to get the bright, cheery feeling that I was looking for. If you need a refresher, here is the kitchen before we did any work:
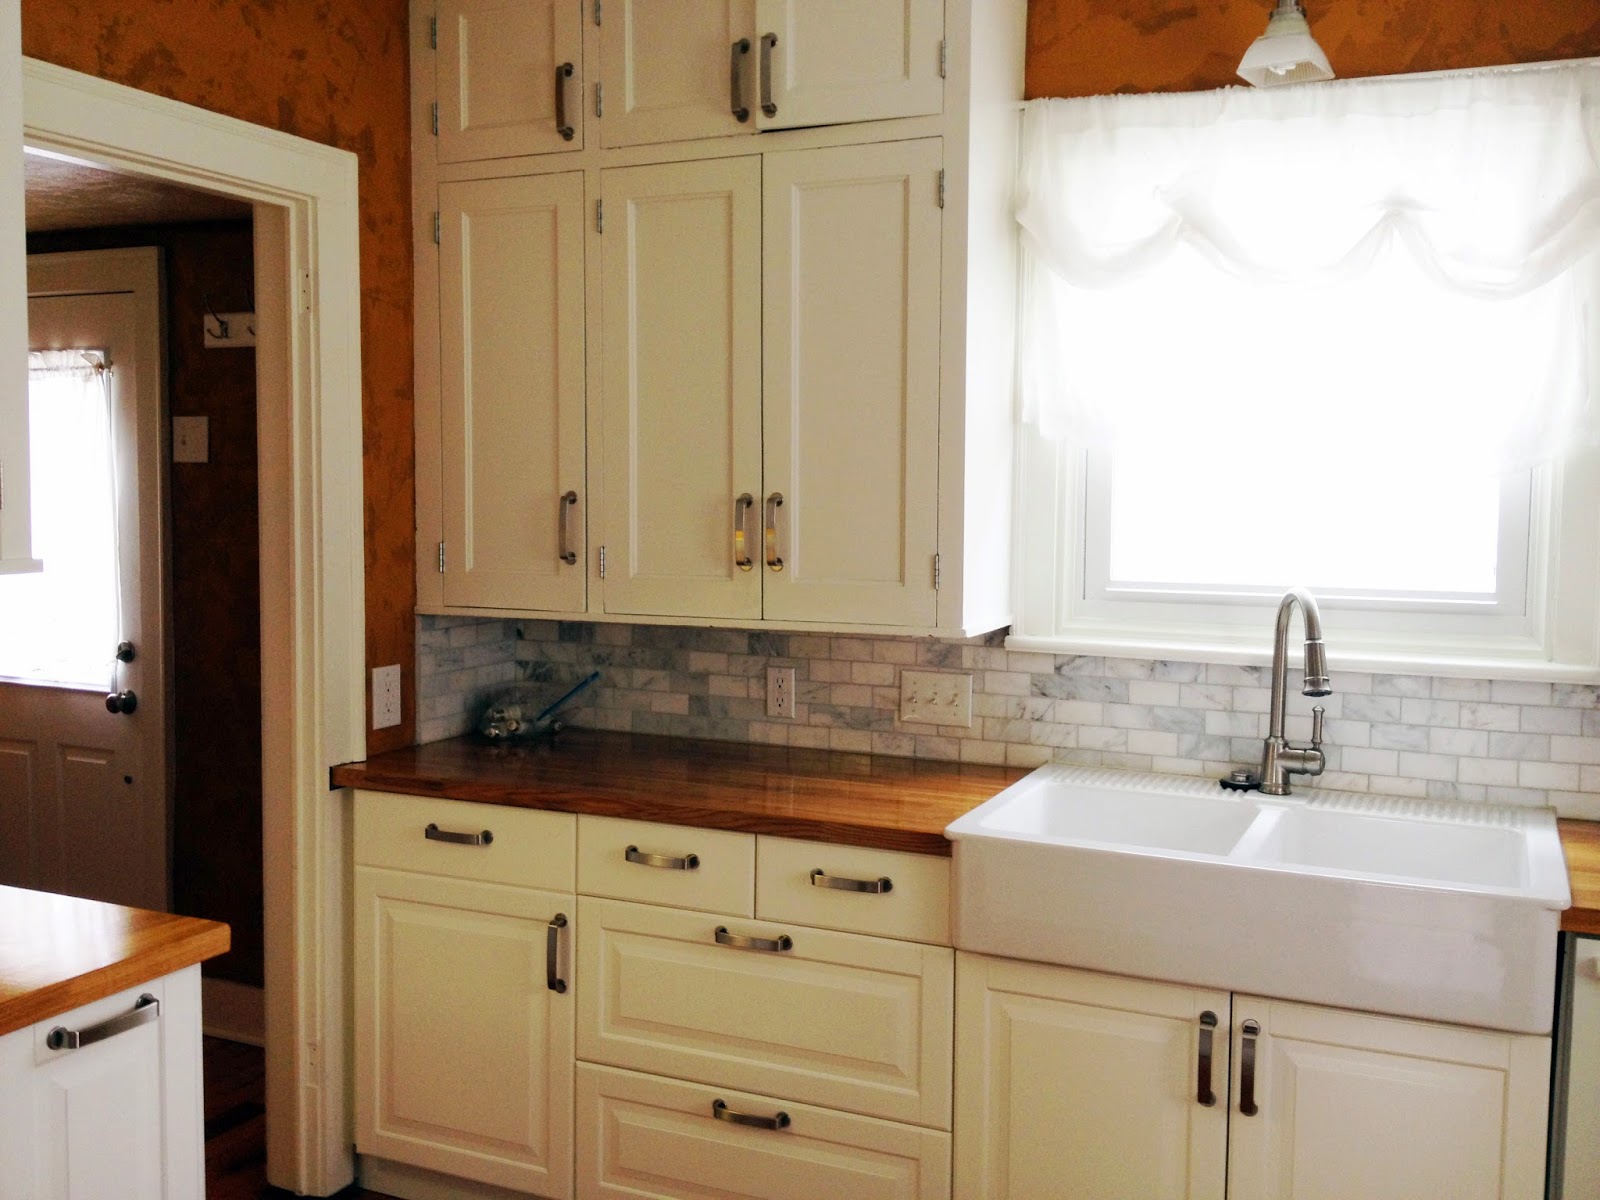


Here is our kitchen after all the skim coating, priming and painting!


What do you think?
Subscribe to:
Posts (Atom)