Sunday, July 6, 2014

House Before & After Series: Master bedroom

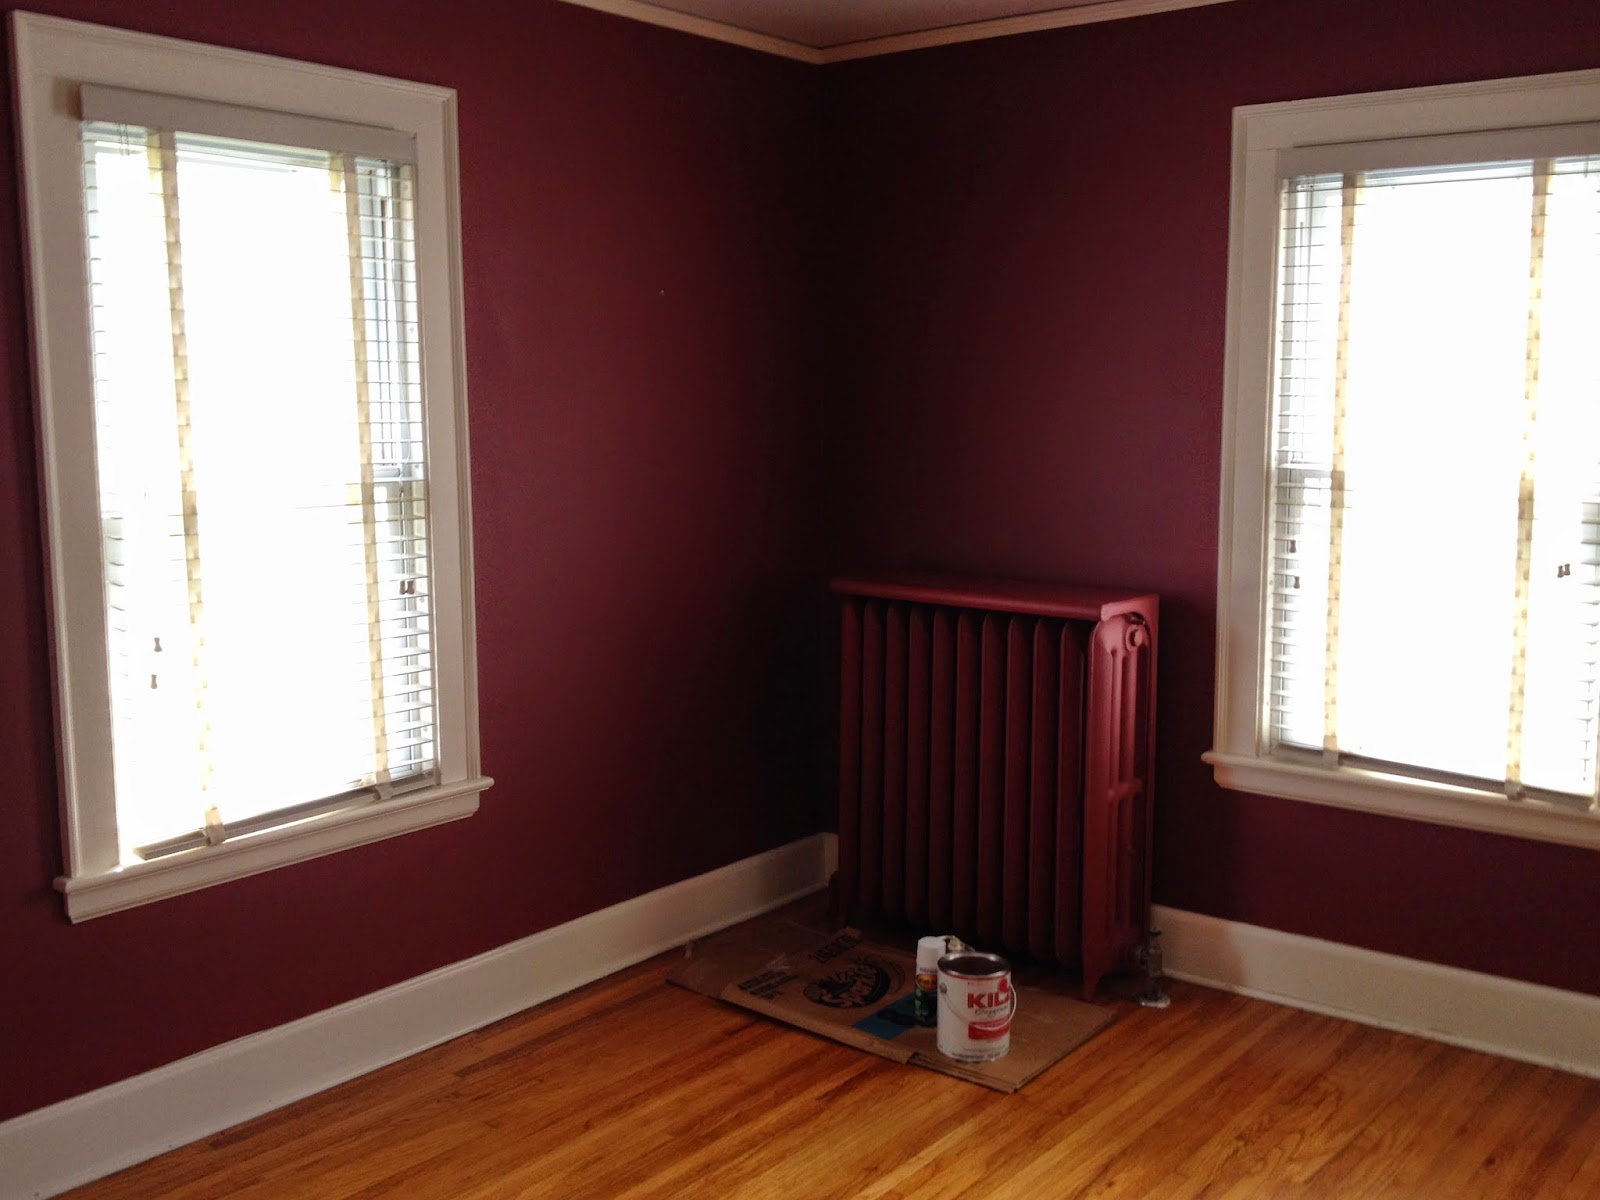
We were so fortunate to find a 3 bedroom house with a nice size master. It's not huge, but it's perfect for us. It has nice natural light and his & her walk in closets. I have always wanted a walk in closet! The previous owners had the bedroom painted a deep maroon color. Definitely not our taste. I was thinking a light blue would be perfect- calming and soft. D wanted a darker color but of course, he had to go with me on this one. Here is the bedroom before:


Notice the radiator that is also painted maroon... and the KILZ primer.


Because the color was so dark, I did't want to take any chances with the paint not covering well. The maroon walls also had a glossy sheen to them, so we decided using oil based KILZ primer would ensure that the new paint covered well. KILZ is some serious stuff. We made sure to open the windows and turn on the fan for ventilation because it is very strong smelling.

I should also note that before we started priming the walls, I painted the radiator first so I could prime over any overspray. I made sure to tape a plastic drop cloth behind the radiator and covered the floor with a drop cloth and cardboard to protect the wood floors. I started off using high heat spray paint, but ended up using regular ivory Krylon spray paint. The high heat wasn't covering as well as I had hoped, and I figured if the previous owners used regular latex paint the spray paint would be fine. It turned out really great!

I ended up choosing a soft blue color that has a lot of green to it. It's a pretty dull, sort of a blue/gray so its not too overwhelming. D doesn't care much for the color- it's too feminine for him. But for me, it's the bedroom of my dreams! Here is our final bedroom:


The chair pictured is the one I actually designed and made in college. 


My grandpa gave me these beautiful jewelry boxes from Korea that were my grandmother's.


Even though the bedroom is feminine, I tried not to make it too feminine. We kept the print minimal. D actually picked out these pictures.


D and I took a pretty big shopping trip to Ikea for some new stuff. We ended up buying the dressers and nightstands from the Hemnes collection. The frames, pictures, curtains and mirror are also from Ikea. They have such great stuff! We upgraded to a king size bed which has been so awesome. I made my own fabric covered headboard (I'll write a DIY post on that later). 

So there it is. What do you think? I think the lighter color actually makes the room look larger. I love how the ivory furniture looks with the floor and ivory trim. It works together quite well.


Tuesday, July 1, 2014

House Before & After Series: Dining room

I have always wanted a formal dining room. My grandpa has a huge wood dining table and that was always the gathering place of my dad's family growing up. I have a lot of wonderful memories of delicious meals, holidays, birthday cakes and fun stories sitting around my grandparent's table. I was so delighted that this house had this one important thing on our home wish list. Here's a view of the room:


I knew immediately what I wanted to do with the dining room. Once I laid eyes on that beautiful queen ann table that our neighbor threw away, everything fell into place. I had made up my mind to paint it teal. A deep, rich teal.  Like I have said, you have to take some risks somewhere in your home. This was my bold move. When I opened the can of paint, I thought to myself "what am I doing?" and "there's no way D is going to like this". During the painting process, I even thought the color was so rich it was causing me intense headaches. D came in to help out and said the same thing. "I think the color is so intense it's making me sick." Oh great. Now we are just wasting time and paint. We figured we would give it a couple weeks and repaint if we still didn't like it. Maybe it just took some time to get used to.  I was so excited to finally hang my Tracey Reese plates that she designed for the Neiman Marcus collection for Target and when I picked the paint color, I thought it would coordinate perfectly. I am happy to say, after a few weeks and many delicious meals at the table, we are so happy we picked the color and we love it! No more headaches- turns out it wasn't the color's fault. This was likely due to all the paint fumes we were inhaling. We've added a few fun decor touches, and the table and chair set fits so nicely! Check it out:


Beautiful flowers my lovely friend Taylor brought us


I got this awesome table runner from Target's coastal collect. It coordinates well with the wall color & the pop of coral trim is so fun.


Ahh I just love this table!


And Benson loves the window view.


Such fun details in the chandelier and built in cabinets.


 And my Tracey Reese plates coordinate so well!


I love it! And no more headaches! So worth the color risk taking!

Monday, June 30, 2014

Refinishing an old wood dining table

So like I mentioned in a previous post, our neighbor was getting rid of this old queen anne style dining table. I had to drag it out of a dumpster area in a parking lot in the cold rain and wheel it over to our apartment garage on a dolly. I dropped it on my foot in the process, but knew it would be totally worth it in the end. D hated this table. He said it was ugly the first time my neighbor asked if we wanted it. The next day, I was thinking about how good the table could look in our new dining room so I had to have it. I also ended up picking up 6 of these awesome tufted dining chairs on sale at Target (but of course). Link

So here is the table before I started:


Some close up shots of the nastiness:


I looked at this table and saw potential. How gorgeous it could look in our new dining room. I knew it was going to take some elbow grease to get it gleaming again. Luckily, the rain softened up the varnish so it was easier to scrape some of it off. I thought I could just use a palm sander on the rest of it until I realized it was wood veneer. So I looked up how to refinish a wood veneer table and came across a great step by step tutorial over at Fabulously Flawed. Link
I made a trip to Home depot to gather all of my supplies. This was not a cheap project. I didn't have existing stuff on hand, so my grand total was about $60 for everything in the tutorial. 

I started by putting the leaves in the table and making sure it was sturdy. I did not want to go through all that work to find out it wasn't usable in the end! The legs needed to be tightened, but other than that it was in great shape. Just needed a little TLC. 

After checking the table's sturdiness, I took all the pieces apart so it would be easier to work on.

I then put on my gloves and safety glasses and got to work. I used Klean Strip and followed directions carefully. It says on the container to let it sit for about 15-20 minutes to let the stripper soften the finish. After trial and error, I found that it works best when you apply a thin coat and give it about 1 minute before you take a plastic scraper to it. I ended up applying more coats than I thought because I let the stripper sit 15 minutes and by the time I went to scrape it, it was dried up and not scraping easily. 

After stripping the finish off, I used my palm sander to smooth out the top and remove small areas of stain & patches of varnish the stripper did not remove. I made sure to wear a dusk mask so I didn't breath in any nasty stuff. At this point, I was pretty happy with my progress. It took an entire sunday- about 6 hours working outside to get the pieces nice and clean. I was a mess and my hands hurt, but it was a labor of love. 

Working on the legs was a little more difficult since they are all curved surfaces. I used a scouring pad and steel wool to remove the finish. Here you can see the before and after of the legs.

I also had to reattach a piece of veneer that came off the table edge. I carefully stripped the finish off then used titebond wood glue and painters tape to reattach.


So finally the hard part was over and all of the pieces were stripped and sanded. I wiped them down with mineral spirits and let them dry overnight. 


Next step was to stain the table. I started by using Minwax wood conditioner on the legs. After wipign that on with a rag, I used Minwax stain in dark walnut. I used a foam brush to apply an even coat on each of the legs.


The stain looked extremely dark, but after about 10 minutes I wiped it off and it wasn't very dark at all. Here's a before and after picture, the one on the left has wood conditioner and on the right it has one coat of stain. I thought about applying a second coat, but when I held one of the new Threshold chair legs against it, the color was very similar so I decided to keep it. 


Here are all 4 table legs with 1 coat of stain applied and wiped off. There is a bit of variation in the color, but I think that is more due to the nature of the wood. It adds character :)


I let the legs dry overnight and the next day planned how I was going to tackle the table top. I checked the legs and they were still a bit tacky, but it was very humid outside. I read online it can take anywhere from 24 to 48 hours to dry, so I left them alone. I decided it would be best to do the table top last, and it would be easier to access the table edge if it was laying upside down, so that's how I stained the underside of the table edge. I was very careful not to apply too much stain and let it run to the other side which would have left ugly marks on the table top. I also wiped off the edge with a rag as I went to make sure i would have a clean line when I applied the stain on the top and edge. 


After all of the edges were stained, I decided to reattach the legs so that I could flip it over and do the table top. I would not recommend attempting this on your own, but D was at work and I am impatient :)


I took a step back so I could see how the color looked and the legs matched the table edge pretty well. I attempted to flip it over after removing the 2 leaves and man this table is solid.


Don't mind the mess in the background, I did this in the garage while we were in the process of packing for our big move. My next step was the defining moment- applying the stain to the table top. This could make it or break it- depending on how the wood grained showed through the stain. I applied the stain very carefully, in long even strokes one section at a time. This time, I decided to let the stain soak in about 30 minutes before wiping it off. It took a lot of elbow grease to get the stain off and I realized a very important tip - USE A RAG TO APPLY YOUR STAIN. I used a foam brush and it pretty much made this whole process take ten times longer than it should have. The foam brush applies too much stain in a heavy thick coat so it has a hard time penetrating the wood and drying. It was very difficult to get the excess stain off of the wood. Once I did, there was still a sticky film of stain over the top. I used the rag to even out some spots and realized how much easier it was to apply stain with a rag and I wished I would have done that all along. 


This is how the table looked once I removed the excess stain with a rag and touched up some areas by applying additional stain with a rag. I definitely had more control of the stain when I applied with a rag. 


At this point it looked pretty great and I let it dry overnight before putting on the polyurethane topcoat the next day. I read the back of the can of poly and it said let stain dry at least 8 hours. Well, it had been at least 12 so I figured it was good right? Wrong. I stirred the can of poly (never shake!) and used a foam brush to apply it. Little pieces of the foam brush seemed to be disintegrating onto the table.  So what did I do next? I decided to wipe the table down with a clean rag to get the little bits of foam off. Bad idea. The rag started to lift the poly off along with the stain. I think this was because the stain was not fully dry due to it being applied so heavily with the foam brush. I swear, it seemed like nothing was going right with this project. I asked D to come take a look and see if it looked ok, and he shook his head. The finish now looked very uneven and lighter in some areas.  I went inside and pouted for about 20 minutes thinking of how I was going to have to let it dry, sand it down and start over. I then decided to try one thing. I soaked a rag in mineral spirits and wiped down the entire table top with it. After wiping it very throughly to remove the poly coat, the table looked much better! It seemed to even out the finish a little more and removed all excess stain and poly. Phew! I didn't have to re-sand it! Doesn't look too bad. I knew it would look great in the end no matter how difficult and frustrating it was to get there!

After letting it thoroughly dry overnight, I used a RAG to apply the stain in the areas that needed it to even out the finish. 

Here's the final result:

And a close up:


It turned out so nice. I need to tell my old neighbor thank you! ;)


Wednesday, June 25, 2014

Wedding invites

Our wedding invites have recently been sent out and it's crazy how close we are getting to the big day! Only 67 days to go! Our photographer posted this lovely picture of our invite suite that I am happy to share. I am so thankful to have such an amazingly talented wedding photographer!


Photo credit: Amber Engfer Photography

Friday, May 23, 2014

House Before & After Series: Living room

We started our house updates with the living room. We ordered new furniture so we wanted to get the room painted before the furniture was delivered. The living room is a perfect size with the wood burning fireplace as the focal point. We love the built ins! We wanted extra seating so we decided a sectional would be best. The only place to hang the TV was above the fireplace due to a radiator on the other wall. That meant the huge mirror had to come down.

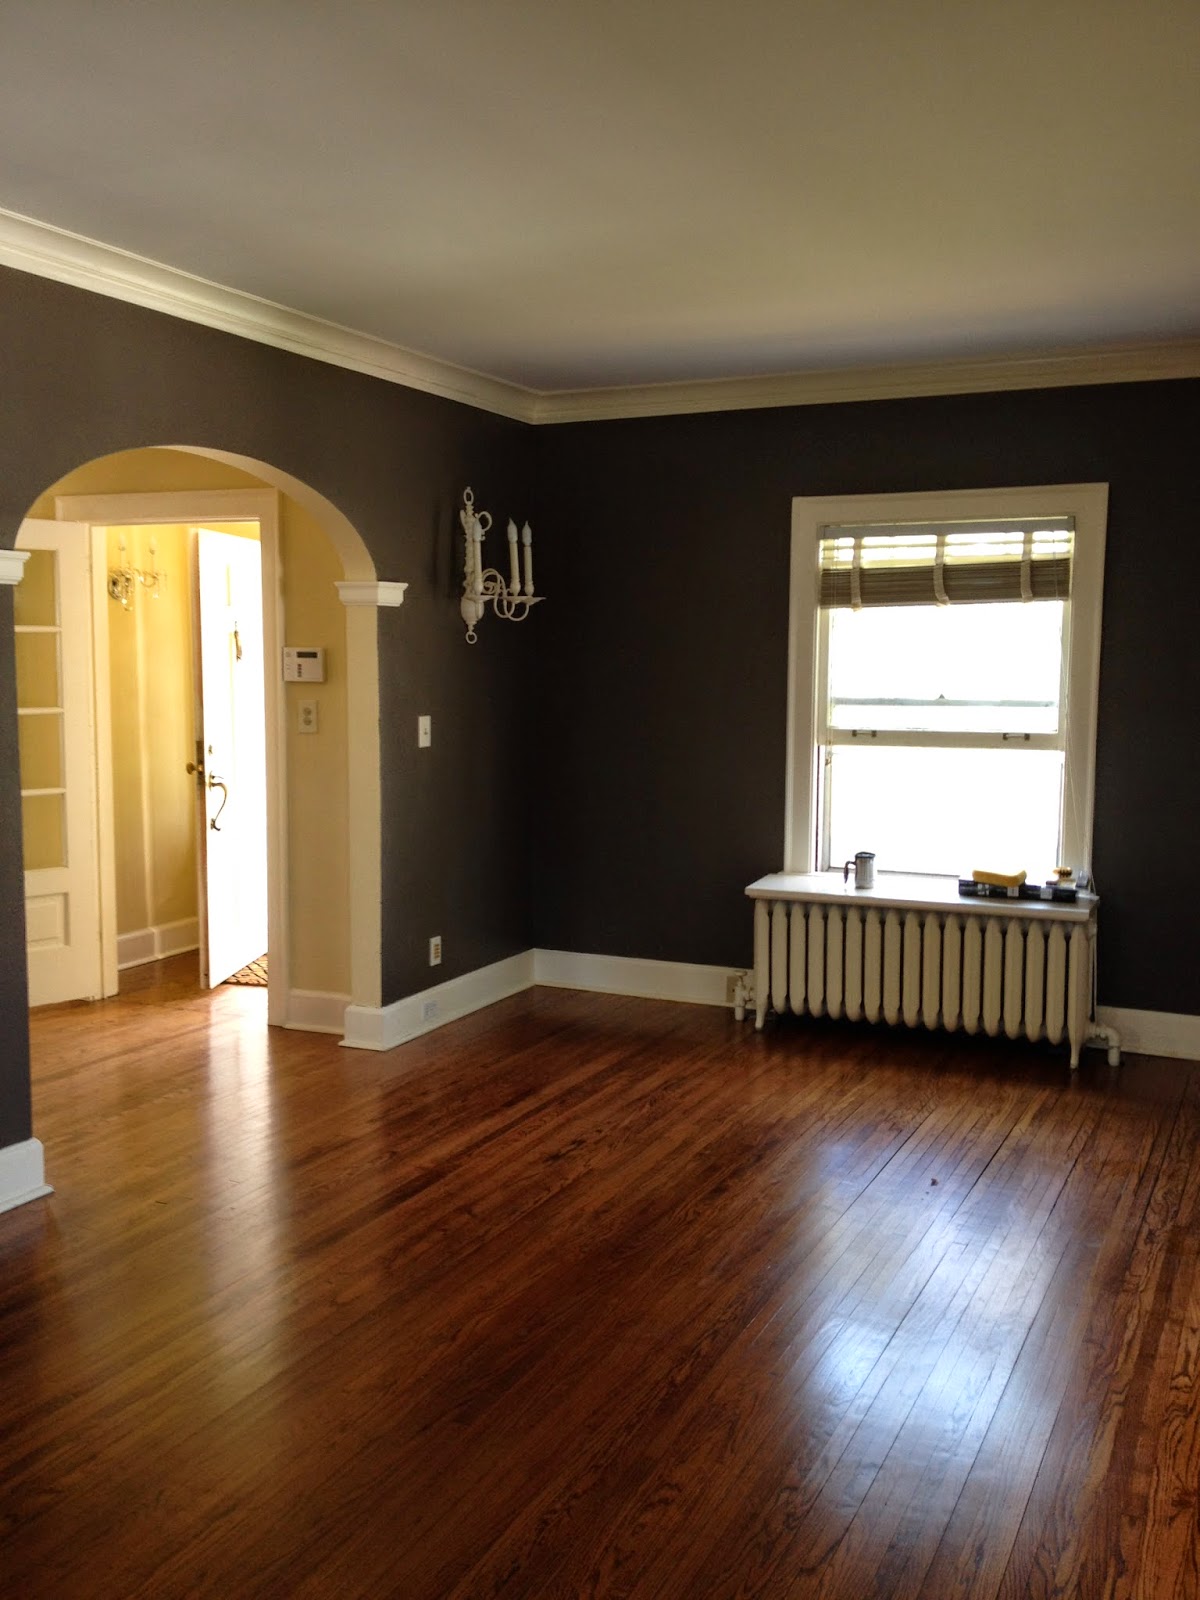
Here is the living room before we started:


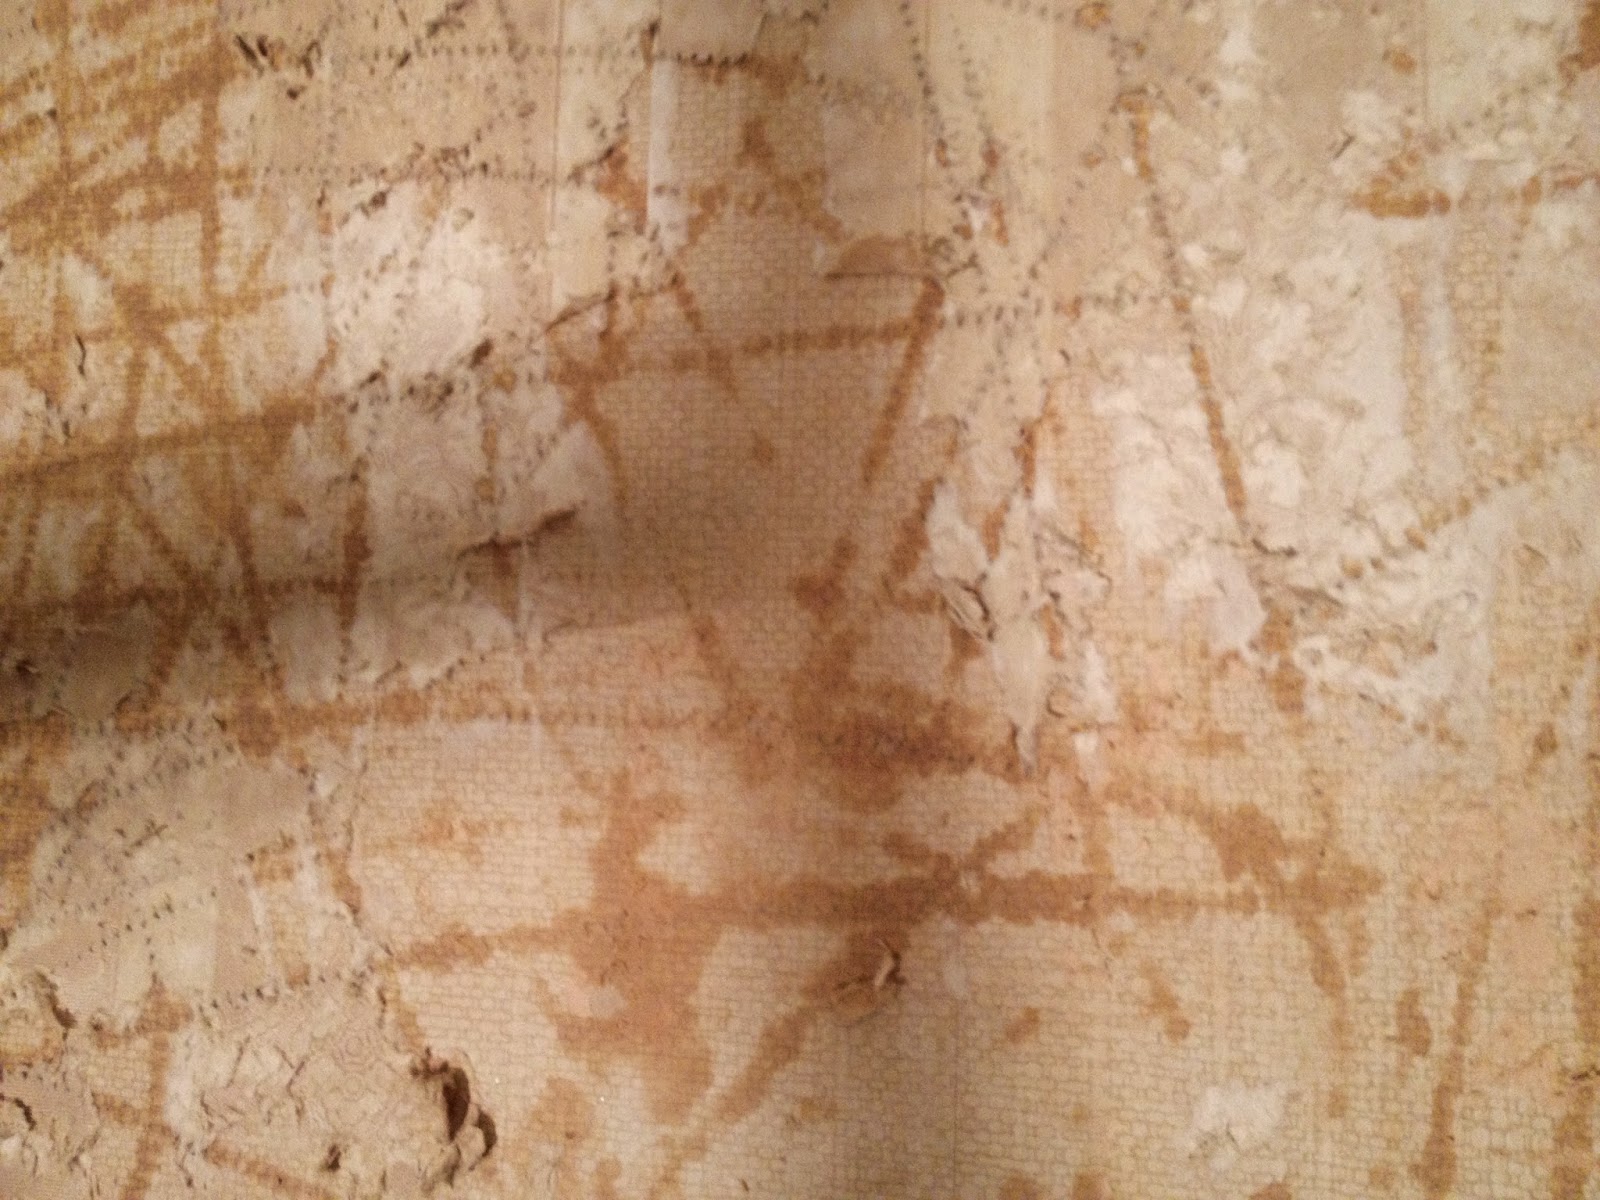
Our project started with removing the mirror. What we found behind it wasn't pretty. It was easy to remove from the wall, but it was extremely heavy. D and I had to very carefully lower it from the mantle and carry it out to the garage without it shattering. We did that successfully (we only broke a little piece off the edge- whoops!) and found this behind the mirror:


Layers and layers of super old wallpaper along with 2 giant holes that were stuffed with newspaper. I guess no one prior to us ever had a TV in this living room. So no need to remove the mirror until now. We pulled out the newspaper to find it was from 1941! How crazy. One of the articles was about a vitamin that would turn gray hair back to it's natural color. Ha!


We found some old electrical wiring in the holes and couldn't figure out what the heck they were for! I was worried that this was going to be a big expensive problem. After a trip to home depot and a conversation with a super helpful lady, we found out there was once sconces where there are now holes. She helped us plan how to cover the holes and remove the wallpaper and gave us everything we needed. We then talked to a guy in the electrical department that helped us figure out if the wiring was safe to cover  We used a wire tester to see if the wires were hot and luckily they weren't so were able to cover them up. The best home depot experience I have ever had. Nothing better than excellent customer service.


 We started by removing the wallpaper. D used a scoring tool to score the wallpaper so the water could penetrate it easier. The lady at home depot recommended using fabric softener to remove the wallpaper, so we mixed a cap full of softener into a 5 gallon bucket of warm water. D then sponged on the solution and scraped the wallpaper off with a metal scraper. We were up until 2:30 am that night (friday- the day we closed!) removing the wallpaper. Our furniture was scheduled to be delivered on sunday, so we had to get the walls painted.


D did such an awesome job cleaning up the wall. I was priming the bedroom while he scraped and periodically sweeping up for him. I would recommend that every homeowner has some kind of wet/dry vacuum or shop vac. We ordered this Stanley vacuum before moving in and it was one of the best purchases we made. Cleaning up was so easy! He stripped and cleaned the wall down to the plaster and we used drywall tape, a metal scraper and all purpose spackling to cover up the holes. When the spackling was dry the next day, I smoothed it out with a final layer and let that dry. I sanded it smooth and used Kilz primer to seal the wall.


We started painting the living room by first painting the edges and near the trim with a brush to make rolling the rest of the wall pretty easy. I should also mention I washed the walls with TSP the night before to make sure the walls were clean so the paint would adhere well. I painted the edges carefully and D rolled on the paint. The color we chose is a dark warm gray color. I thought it would look great against the white trim and warm wood floors.


I am so glad I eat a lot of Talenti because the containers are perfect for painting! I poured some in the jars and used that to paint the trim. So easy! It is great for storing touch up paint too because it has a nice screw on lid. 


One wall was done with the first coat and it looked pretty great! We used Sherwin Williams super paint in satin finish, which is a paint and primer in one. It went on really smooth and coverage was pretty good.  


I had to remove the brass wall sconce so I could paint. I was originally putting this thing on craigslist, but I figured I would try spray painting it first. Here is the before:


After a few light coats of spray paint, I loved it! It turned out so well! I used an ivory spray paint that matched the trim color. It really pops off the gray walls. I love it because it stays true to the old charm of the house but the white color makes it more modern. 


Once the first coat of paint was dry, D and I quickly went over the walls and edges with a second coat and focused on the areas that really needed it (where the lighter color was showing through). This paint had pretty great coverage so a full second coat wasn't needed. Here are the completed pictures:


What do you think? I love it! I will update soon with everything moved in.

UPDATE: I finally got around to taking some pictures this past weekend. We are all settled in and loving it!